UV Unwrap
After both the Low Polygon and High Polygon Modelling have been completed, it is time to unwrap the model to prepare it mapping. To start unwrapping the model, apply a Unwrap UVW modifier to the low polygon model in the Modifier panel. I changed the base colour of the model from blue to yellow in order for the green and blue seams used by the unwrap to become more visible.

When the Unwrap UVW modifier is applied, the green seams can be seen on the edges of the model. The seams added by the modifier is usually not enough to unwrap the entire model properly. In the Selection tab, select the Edge selection mode. To get a better idea of how unwrapping works, imagine that the model is spited by the edges and lay the polygons onto a 2D plane. By doing this, it would enable the model to be coloured by 2D image editing software, such as Photoshop.
To start unwrapping, click the Open UV Editor button on the Edit UVs tab. When it is first opened, the canvas should look like something shown in the image below.
To start unwrapping, click the Open UV Editor button on the Edit UVs tab. When it is first opened, the canvas should look like something shown in the image below.

At the moment, it is a mess, it must be unwrapped and be laid out properly for it to be ready to be textured. Each polygons must be ;laid out flat horizontally onto the canvas space (the area with the checkered pattern) to avoid any distortion when it is textured.
The way I used to unwrap the polygons for majority of the time was a very slow process. I chose the Select Poly Mode in the Selection tab of the Unwrap UVW modifier, then select one polygon from the object and then click on the Planer Map button on the Projection tab. But before doing the previous step, unchecked Normalize under the Configure tab and keep it unchecked. This will prevent the re-sized polygons from being constrained to the checkered canvas, which could distort the polygons from its original shape, as they are limited by the size of the canvas.
The way I used to unwrap the polygons for majority of the time was a very slow process. I chose the Select Poly Mode in the Selection tab of the Unwrap UVW modifier, then select one polygon from the object and then click on the Planer Map button on the Projection tab. But before doing the previous step, unchecked Normalize under the Configure tab and keep it unchecked. This will prevent the re-sized polygons from being constrained to the checkered canvas, which could distort the polygons from its original shape, as they are limited by the size of the canvas.

The polygon selected will be stretched to its original shape in the Edit UV. The polygon should now look like something shown in the image below.

The polygon can be re-sized to fit in the canvas. But for now, move it outside of the canvas.Repeat the same process to another polygon that shares a edge with this polygon. After it is completed, move it next to the polygon that was unwrapped earlier. When you select on one of these polygons, a edge on the other polygon will be highlighted in blue. The blue edge is the one that is shared by the two polygons on the model. You may choose to connect the two polygons together to ease the process of texturing later on. But it should only be done if connecting these polygons will not result in the distortion of these polygons or that the of the other polygons or polygon clusters. If connecting certain polygons could result in distortion or affect other polygons or clusters, they should be left alone or be attached to more appropriate places. To connect the edges, find the edge that must be connected by highlighting them one by one until the corresponding edge on the other polygon turned blue. You may right click on the edge and select Stitch Selected or click on Stitch: Custom under the Stitch tab on the right hand side of the UV Editor. Beware, some of the other stitching options available may result in only the edges be moved, instead of moving the entire polygons to their correct places. The result will be shown below.

The blue edge shows that these two polygons are stitched together.
It is possible to planer map more than one polygons at once, but I have encountered some problems when doing so. One of the problems is that the polygons are not stitched together when planer mapped, which slightly defeats the purpose of doing them all together. This also makes it to be impossible to re-size, as they will do so independently, therefore could cause overlaps.
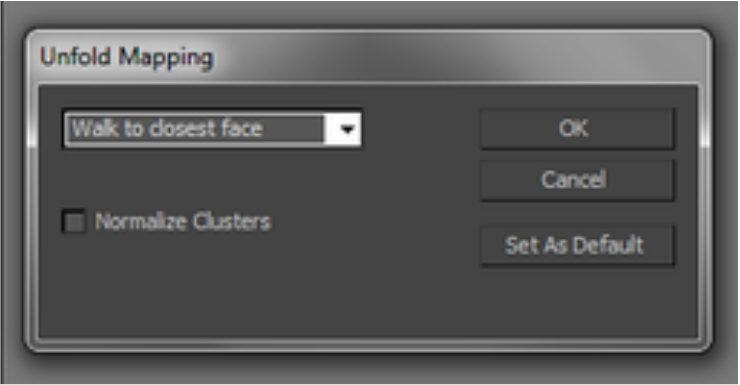
Later on in the unwrapping process, I started using the Unfold Mapping option in the Edit UVWs, which unfold the faces that was selected.
It is possible to planer map more than one polygons at once, but I have encountered some problems when doing so. One of the problems is that the polygons are not stitched together when planer mapped, which slightly defeats the purpose of doing them all together. This also makes it to be impossible to re-size, as they will do so independently, therefore could cause overlaps.
Later on in the unwrapping process, I started using the Unfold Mapping option in the Edit UVWs, which unfold the faces that was selected.
Using this feature, it allowed me to quickly unfold various parts of the crate and the stitch them toether if it doesn't cause overlapse. Below is a image that shows what the unwraped UVs look likes.

